Showing posts with label Home Decor. Show all posts

September 20, 2010

Fall Wreath

Fall is here... sort of. I still feel the blistering hot weather, BUT I know the leaves are about to start changing, the temperatures are about to start dropping, and pumpkins are about to come out! So, that is why I am starting my fall crafts....

And, I do believe that you will be quite impressed with the price of this lovely wreath. It cost me somewhere around 4 bucks! You gotta love the dollar tree. <333


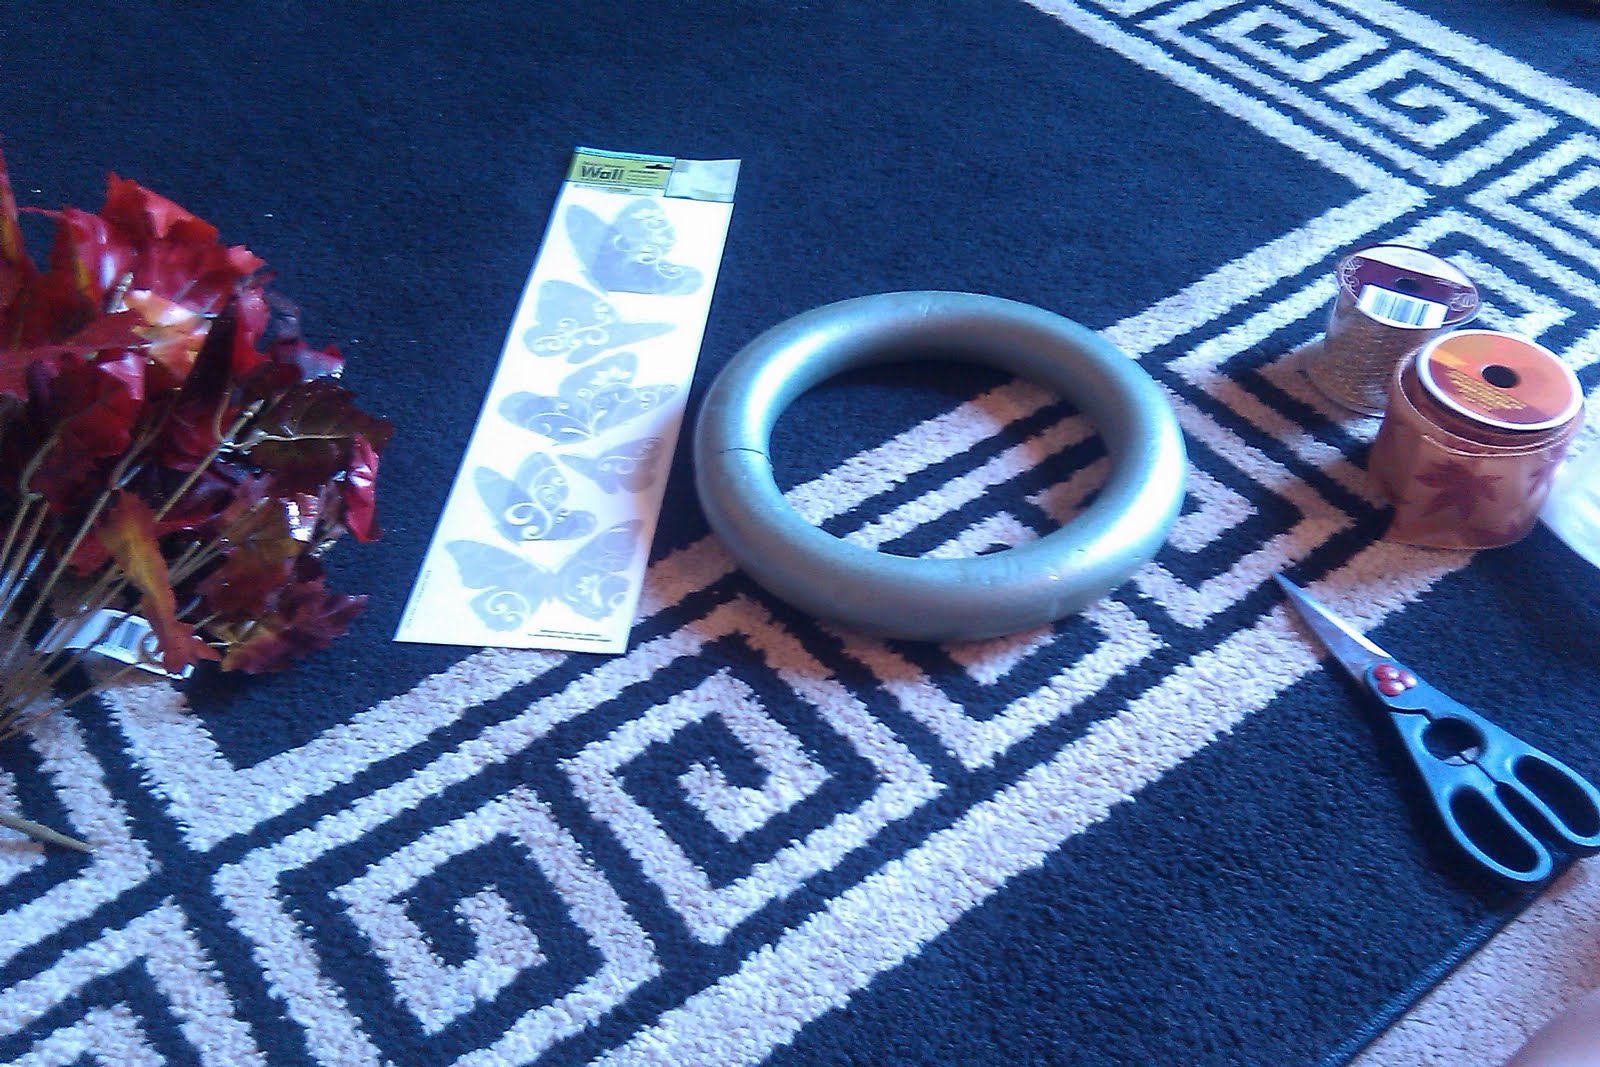
First, I just gathered my materials... for four bucks... from the dollar tree! A styrofoam wreath template, some various fall leaves, and two kinds of ribbon.
Next, I wrapped the wreath template with my pretty fall leaves ribbon. 
Keep in mind, all I'm doing is hot glueing this stuff. Simple, simple! Then, in groups of three leaves I started gluring little mini leaf groups together and positioning them on the wreath however they look best! Then, add your big piece of ribbon to attach it to your door. Finished!
 The dollar tree also treated me well by giving me some cute fall kitchen decor. Yay for today!! I am VERY happy!!! :)

September 18, 2010

Love Magnets

So, I wanted to jazz the refrigerator up a little bit. I have this odd obsession with magnets. I like to switch them out.... constantly. haha My friend Julie and I went to Hobby Lobby and grabbed some wooden letters, mod podge, and cute scrapbooking paper. All you do is cut the paper out to fit the wood blocks, mod podge it on there, then take some magnets and adhere them to the back! Simple, simple, simple!

I also stopped by a local thrift store, and bought a darling little knick knack to go in my living room bookshelf. Cute, right?


 1 Corinthians. "And now these three remain: faith, hope and love. But the greatest of these is love."

August 21, 2010

Dresser Redo/ Craft Room Update!

Ok, so this is my dresser that I redid! I needed a little more room for craft supplies. The desk and closet were overcrowded, so I decided to give my ugly little dresser a little revamping. I like how it turned out! The before pictures are not so attractive. See...
So, I took the ugly little Walmart dresser outside to redo it. I cleaned it down with some VSP and water first to make sure that all the dust and glossy-ness was broken down. Then, I got these materials...

It is pretty hard to paint plaster board, so you need to make sure that the surface is extra clean. Otherwise, it will bubble up and peel off. Also, you need a really good primer. I took two coats to my little chest of drawers.
I let it dry about one hour between each coat of primer. It was a really hot day though, so the time may be different. About two hours later, I started the painting process. I put two coats of paint on, too. This dried overnight. Then, I took it in! I like how it turned out!
I thought the satin white color was a bit too bland, so I dressed it up with some cute flowers and laced ribbon all around the top edges. I started in the front (like pictures below) and just hot glued the lace ribbon all around the edges. I think this matched everything well. It also fit the crafty theme.

I filled the shelves with craft supplies and papers, etc. I also bough these super cute baskets for a couple dollars at Big Lots. I filled them with my most used craft supplies.

So, what do you think?

August 19, 2010

I Believe... frame

So, last night I had the urge to use a bunch of super cute scrapbooking materials. I thought making a frame out of scrapbook stuff would be cool. Plus, I've never done that before. So, Devin, Sommer, and I got together for a craft night! I came up with the above picture! I have always LOVED the I believe poems that different people write and publish to their websites, profiles, signatures, portfolios, or whatever. Mine is really basic; however, these are my favorite things. I REALLY liked the idea of making something for my visitors to let them know the most important things that I believe in... just in case they don't already know me yet!


Materials Needed:
two kinds of scrapbook paper
ribbon
scrapbook embellishments and decorations
hot glue gun
glue stick
paint pen
alphabet stencil
frame


So, start off by cutting your scrapbooking paper to the size of your frame. 


 Then, take your sides and cover them with some ribbon. 

Then, take your second piece of scrapbooking paper and your alphabet stencil. Start writing out your "I Believe..." beliefs. ha


After you cut out these words(or statements) then add all your embellishments and materials. Last, cover with glass and stick it in the frame! Your done!!!


By the way, thank you so much to everyone who has left me sweet comments and started following me!!! I get so excited each time haha Lame, I know. ;) Anyways, I'm very excited to be a part of the crafting blog community, and I look forward to giving you an awesome (hopefully??...) post and craft I make each day! 


Much love,


August 13, 2010

Inspired by the crafting community...


So, I was really inspired by some of the awesome craft sites I've been visiting lately. I added them on the right to my link's list. Anyways, I figured I'd start the post off with some recent pics of things I've updated in my little townhouse just to show what I've been working on! Plus, tonight I'm REALLY excited. I found a pretty cool tutorial on Night Owl Crafting. I'll post pics later of how I did.... I did things a bit different, but still got the idea from her FABULOUS site.You can click below to check out her site!


NightOwlCrafting

This was my first little "mini" project. I bought some vinyls and cut them apart. Then, I put them on cardstock scrapbook paper, and framed them. Total cost= like 4 bucks! YES! And if you can't read it (because my camera sucks) it says, "Love makes everything grow!"

Then, I was oh so excited about this! I am in love with Audrey Hepburn. So I re-set up my little bay window with classy pics, candles, pillows, and such. The curtains are black and white, so they match my bedroom. I bought curtains with little slots in them so to speak, so I went to the dollar tree and just bought some fake flowers to stick in them. Yay!

This was a cool idea I got from Ashley's Thrifty Living. It was a two dollar mirror! Check out her site that I linked on the right to make it! It's so easy and so cute!! By the way, this is NOT the right colors of my wall, mirror, and picture. I MUST invest in a new camera asap!
I had to include this because I ADORE yard sales. I got this little black "tray" for .5 cents! What a steal! I repainted it, and decorated the mirror parts with scrap booking materials and look now it is presentable! haha Always looking for POTENTIAL is key. ;)

Anyways, I am off to work on the awesome craft I mentioned above. I will take pictures of the step by step process, so I will have a tutorial up later or tomorrow! Please comment, I would really love to get to know some of you all! Hope to hear from you soon! By the way, does anyone know about competitions or crafting days in the craft blog community? haha I have been real interested, but I have no idea where to start...